Form View in Odoo | Button states and ButtonBoxes
June 28, 2022
In this blog, we are going to discuss the form views in Odoo and also explain how to add button states and button boxes in the form view.
Adding Buttons:
Buttons are a kind of returning specific function.
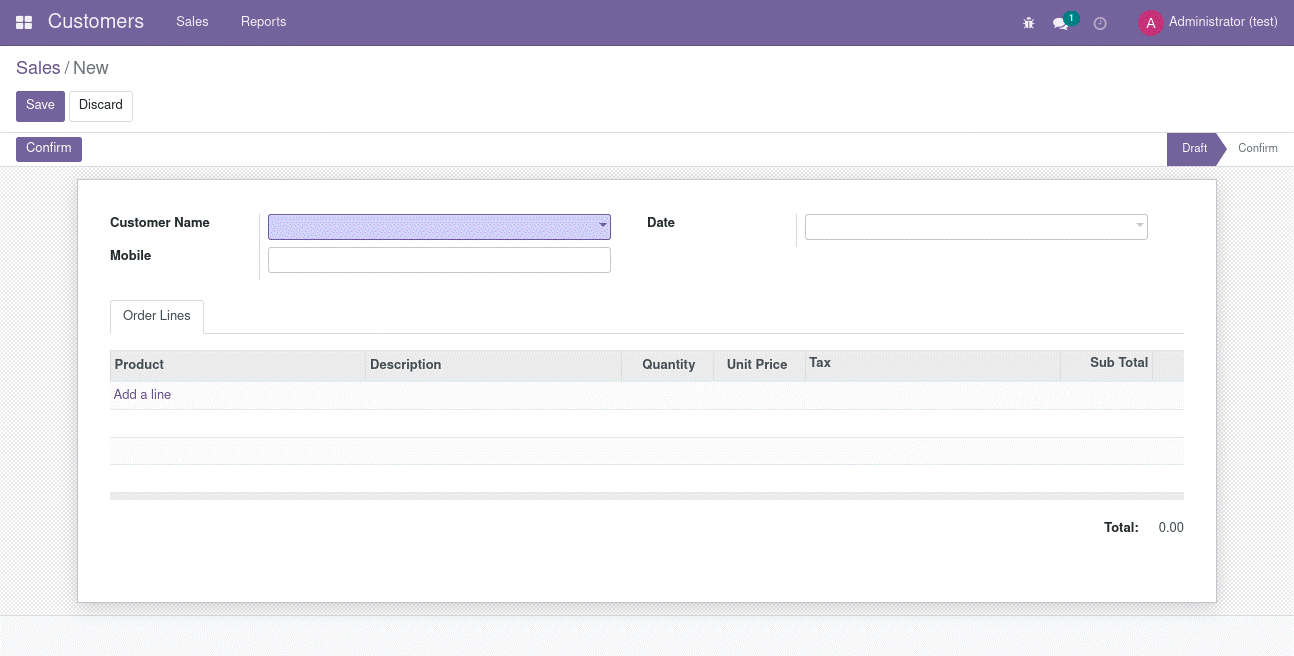
Upon clicking the confirmation, the form moved to confirm the state. Now let us see how to add these buttons using python:
from odoo import models, fields, api
from datetime import date
class test(models.Model):
   _name = 'test.new'
   _description = 'Sales'
   cust_id=fields.Many2one('res.partner',string="Customer
Name",required=True)
   mobile=fields.Char (String="Mobile")
   date=fields.Date("Date")
   test_ids=fields.One2many('test1.new','test_id',string="Product")
   state =
fields.Selection([('draft','Draft'),('confirm','Confirm')],default="draft",r
eadonly=True)
   total = fields.Float(string="Total",compute='_compute_total')
   def button_reset(self):
       for rec in self:
           rec.state = 'draft'
   def button_confirm(self):
       for rec in self:
           rec.state = 'confirm'
           rec.date = fields.Date.context_today(self)
Button_confirm is the function defined for adding the confirm button in this form.
Adding States in Form view:
- There are mainly draft states, confirm states, and cancel states in almost all forms in Odoo 15.
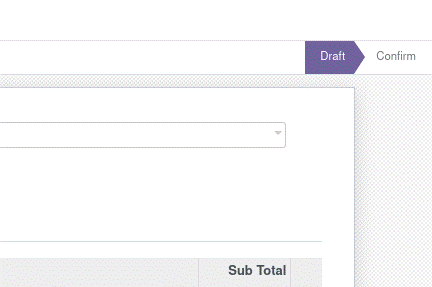
Here we can see the two states’ drafts and confirm. When we click on the reset button, it will go to the draft state. And also by default, it is in a draft state and also, and upon clicking the confirm button, it will be on confirm state.
- Given below is about how we can add these two states. Referring to the above code.
Consider this:
state =
fields.Selection([('draft','Draft'),('confirm','Confirm')],default="draft",readonly=True)
- This code declares a field called state, and the state is a selection field. Inside the parentheses, the two above said: states are declared: draft and confirm.
- The form will be in the draft state by default and the state made as read-only. That means it cannot be edited.
Then consider this code:
def button_reset(self):
       for rec in self:
           rec.state = 'draft'
   def button_confirm(self):
       for rec in self:
           rec.state = 'confirm'
           rec.date = fields.Date.context_today(self)
Explain two functions. The first one is a button reset and here, when we click on the reset button, the state will be,
changed to the draft state.
Button to Confirm
Next is the button to confirm. Upon clicking the button confirm, the state moved to confirm.
Here, look at the XML code:
<header>
                 <button name="button_confirm" string="Confirm"
class="oe_highlight" type="object" states="draft"/>
                 <field name="state" widget="statusbar"
statusbar_visible="draft, confirm"/>
               </header>
Adding Button boxes in the Form view:
- We can easily do adding button boxes using python code.
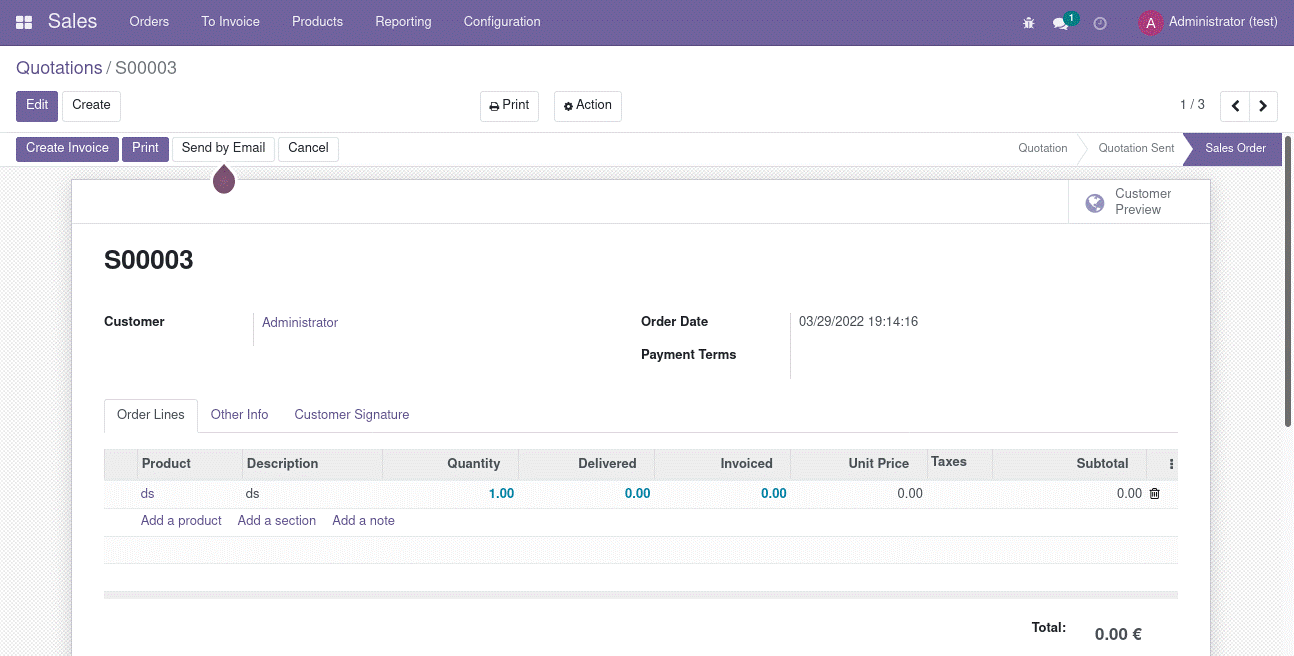
- Here, the button box is a customer preview. Upon clicking the button box, it works like a button.
- Let us study how this is to be added using python:
Consider this code:
<div class="oe_button_box" name="button_box">
                       <button name="preview_sale_order"
                           type="object"
                           class="oe_stat_button"
                           icon="fa-globe icon">
                           <div class="o_field_widget o_stat_info">
                              <span class="o_stat_text">Customer</span>
                 <span class="o_stat_text">Preview</span>
                          </div>
                       </button>
                       <button name="action_view_invoice"
                          type="object"
                           class="oe_stat_button"
                           icon="fa-pencil-square-o"
                           attrs="{'invisible': [('invoice_count', '=',0)]}">
                          <field name="invoice_count" widget="statinfo"string="Invoices"/>
                       </button>
                   </div>
<div class="oe_button_box" name="button_box">
<button name="preview_sale_order"
                           type="object"
                           class="oe_stat_button"
                           icon="fa-globe icon">
                           <div class="o_field_widget o_stat_info">
                               <span class="o_stat_text">Customer</span>
                               <span class="o_stat_text">Preview</span>
                           </div>
                       </button>
                       <button name="action_view_invoice"
                           type="object"
                           class="oe_stat_button"
                           icon="fa-pencil-square-o"
                           attrs="{'invisible': [('invoice_count', '=',0)]}">
                           <field name="invoice_count" widget="statinfo"string="Invoices"/>
                       </button>
                   </div>
Displaying a Button box
Here, first, the class is define as oe_button_box for displaying a button box and name as preview_sale_order and giving1 the proper icon and all.
def preview_sale_order(self):
       self.ensure_one()
       return {
           'type': 'ir.actions.act_url',
           'target': 'self',
           'url': self.get_portal_url(),
       }
"Unlock the Full Potential of Your Business with Odoo ERP!"
"Get a Cost Estimate for Your ERP Project, Absolutely FREE!"
Get a Free Quote