
How to Load Demo Data in Odoo 17

Odoo is a well-known and robust open-source enterprise resource planning (ERP) platform that helps companies manage resources, improve productivity, and streamline operations. One common requirement for custom modules that are used to customize Odoo to suit business needs is the integration of demo data. Demo data is frequently utilized in the testing and training stages as it offers a useful means of demonstrating how the system operates.
We’ll look at two common ways—XML and CSV files—to contribute sample data to your unique Odoo modules in this blog post. This tutorial will take you step-by-step through the custom module development process, regardless of your experience level with Odoo development. In the conclusion after reading this article, you’ll know exactly how to include demo data into your modules to improve the effectiveness and user-friendliness of your ERP deployment.
Using an XML file, create the demo data
XML files are a useful resource for introducing demo data to Odoo modules since they make it simple for developers to define and load sample records.
To do that, we must first create the demo directory and add an XML file with the demo data to it.
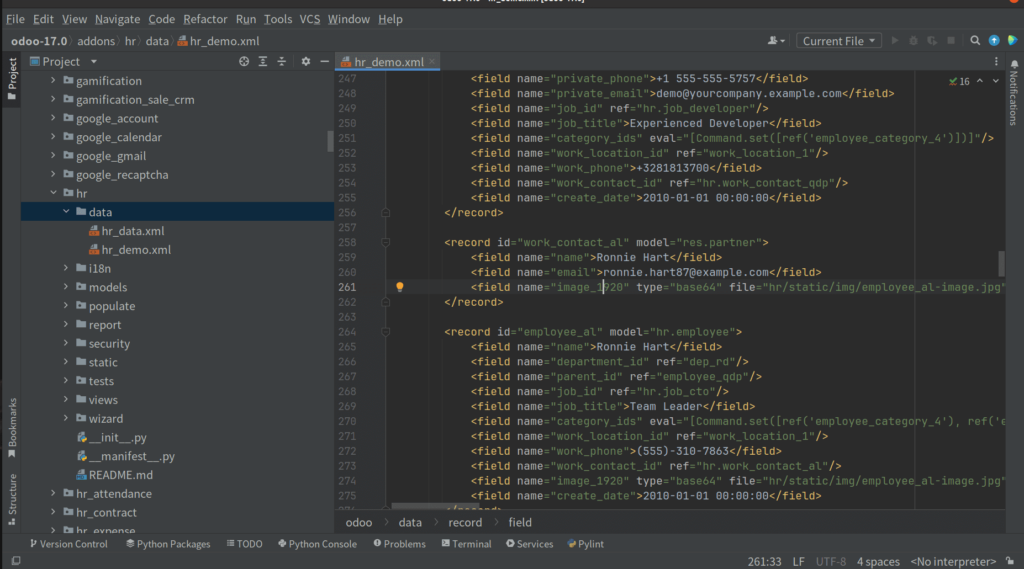
Make a file in that directory called hr_demo.xml. The XML file contains the following code:
<?xml version="1.0" encoding="utf-8"?>
<odoo>
    <data noupdate="1">
        <!--Department-->
        <record id="dep_management" model="hr.department">
            <field name="name">Management</field>
            <field name="color" eval="5"/>
        </record>
    </data>
</odoo>
I’m attempting to set up a Management demo department here. You’ll notice a new attribute called no update in the data tag before we go there.
<data noupdate="1">
The contents of this datas file should only be used once when installing the module, so if we add demo datas, we must specify no update = 1.
The next step is to include the path to this demo datas file in the manifest. As follows, we can incorporate it:

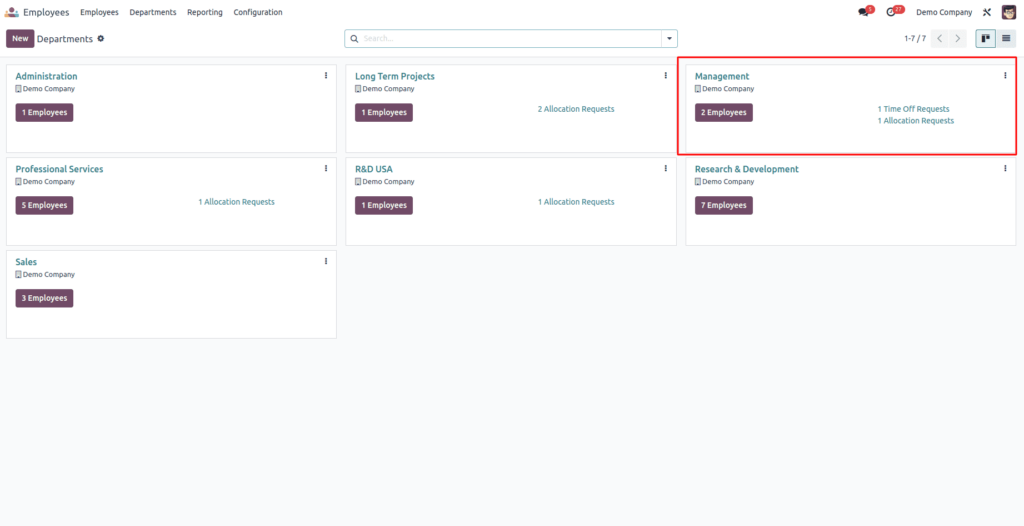
Install the module after making a database and enabling Load demo data. The data will be loaded automatically. The records won’t be created and the demo data won’t load if Load Demo Data is disabled. The Employee Management Department is shown in the following image.
Generate a CSV file with the demo data
XML files are known to be flexible and self-descriptive, but when you need to generate multiple simple records for a single model, they can get pretty lengthy. It is more sensible to use CSV (Comma-Separated Values) formatted data files in these kinds of situations. Concise CSV files are ideal for effectively managing massive volumes of data.
But, it’s important to remember that if you choose to use CSV to generate demo data, one important thing to keep in mind is that you will need to prepare individual CSV files for every different model that you plan to load data into. Put differently, you will require a separate entity or record type for each type of data you wish to use as demo data in your Odoo module you will require a specific CSV file. This separation facilitates the process and helps maintain data organization when working with multiple models.
In the sections that follow, we’ll go over how to efficiently use CSV files in Odoo for the import and management of demo data, which will make it easier to load sample records into your ERP system.
Here, I’ll walk you through creating demo data for currencies. For this use, create a CSV file named res.currency.csv in the data directory. You can add the following data to that file.
This blog post discussed two well-liked techniques for populating your custom Odoo modules with sample data: XML and CSV files. Both approaches are effective and flexible, enabling you to generate sample records and enhance the usability of your ERP system. In this tutorial, we explained a detailed method for adding demo data to your modules.
Records can be loaded with XML files and with the XML method we can ensure that the data is loaded only once during module installation. Also, the CSV method provides a simple and effective way to import and manage demo data when handling a large number of records for different models.
Including demo data in your Odoo modules is a useful way to showcase the system’s capabilities and boost ERP implementation efficiency. You can effectively customize Odoo to meet the unique needs of your business, regardless of whether you choose CSV or XML to control resources and optimize processes.
"Unlock the Full Potential of Your Business with Odoo ERP!"
"Get a Cost Estimate for Your ERP Project, Absolutely FREE!"
Get a Free Quote
The reputation of the website will surely see an improvement in the near future as a result of the high-quality content and the active involvement of the administrator.