Track Cost and Revenue Using Odoo 17 Analytic Account
The Analytic Accounts feature in the Odoo Accounting module allows you to keep an eye on specific costs and revenue. You may create a chart of analytical accounts in your system to record particular analytical entries based on the requirements of your business. These accounts are linked to the Odoo general accounts even though they are managed independently. To gain this functionality in your Accounting module, you need to enable the Analytic Accounting option from the Odoo 17 Settings menu
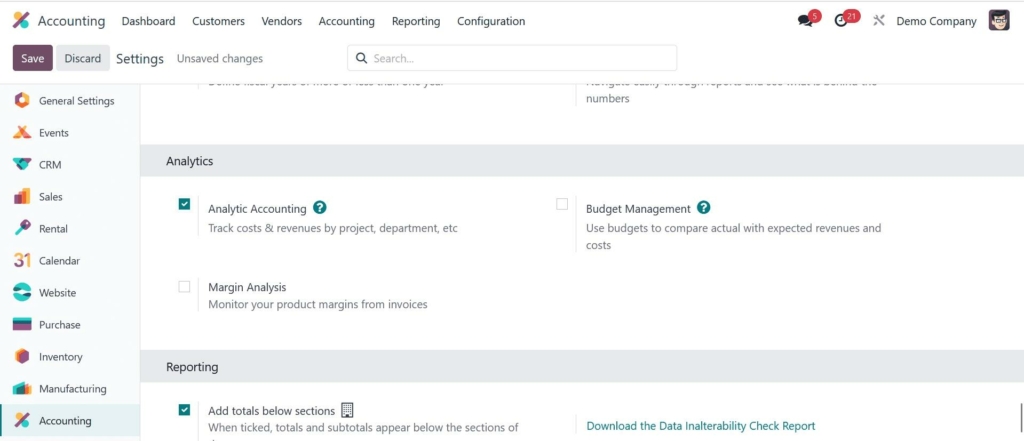
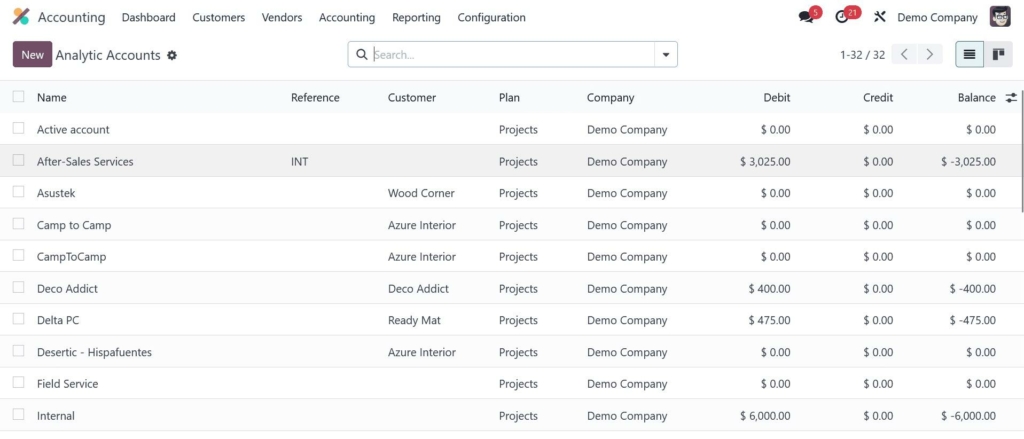
As soon as you activate this feature, the Analytic Accounting options will appear in the module’s Configuration menu. By choosing the Analytic Accounts option, you can get a list of all the analytical accounts that are present in your system. The list view shows the Name, Reference, Customer, Plans, Company, Debit, Credit, and Balance for each analytic account.
It is easy to set up a new analytical account in the Accounting module.
Click the “New” button to bring up the new setup window that appears below.
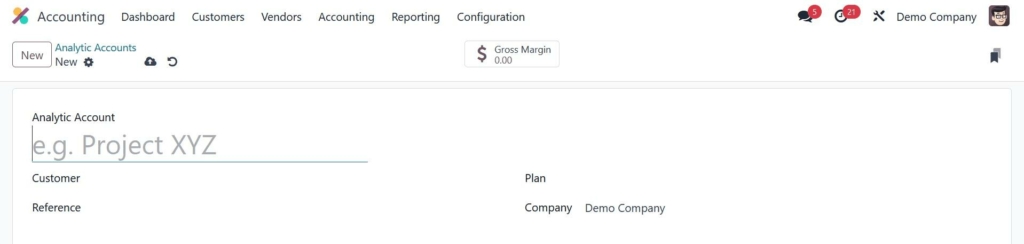
Enter the account name in the Analytic Account field. If you know whose customer this account belongs to, you can enter that customer’s ID in the Customer area. Mention the Reference, Company, and Currency that were used to document the analytical entries in the appropriate field. The Plan field is a new feature in Odoo 17 that lets you select the best analytic plan for this account. Another way to create a new Analytic Plan is through the Configuration menu of the Odoo accounting module.
The list of potential analytical plans will be displayed in this window, as seen in the screenshot below.
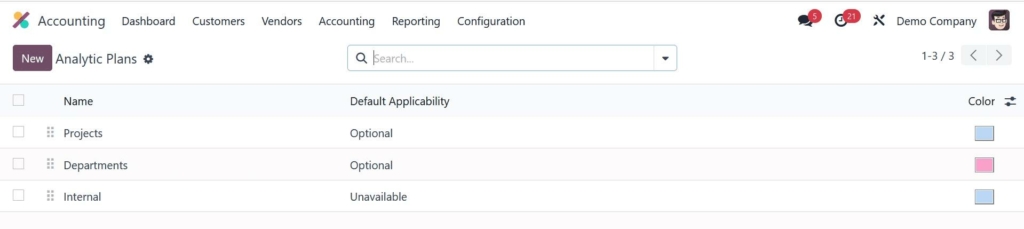
It’s simple to make a new one with the New option.
After giving the plan a name, you can specify its Parent plan and Default Applicability in the corresponding fields. You can select a hue that complements your scheme of identification effectively. The name of your business will show up immediately in the appropriate field. To indicate the applicability of this plan, utilize the Add a Line button located under the Applicability tab. The domain can be miscellaneous, sales order, invoice, vendor bill, or expense. The prefix listed in the Financial Accounts Prefix indicates which accounts from the financial accounting to which this applicability should be applied.
Similarly, include a list of the Product Categories for this analytical plan. One can designate the Applicability as Required, Optional, or Unavailable. Use the window’s smart button to join a parent plan with a subplan.
You can access the analytical accounts linked to this strategy by clicking on another smart button on the same page.
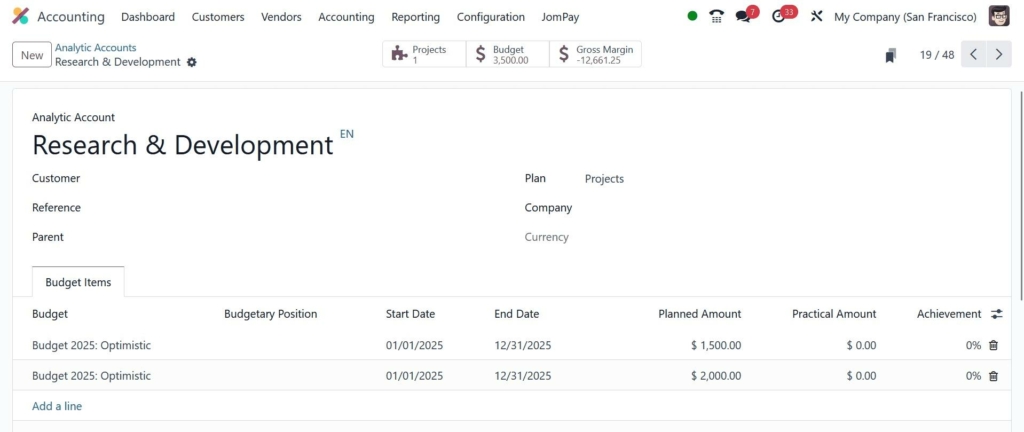
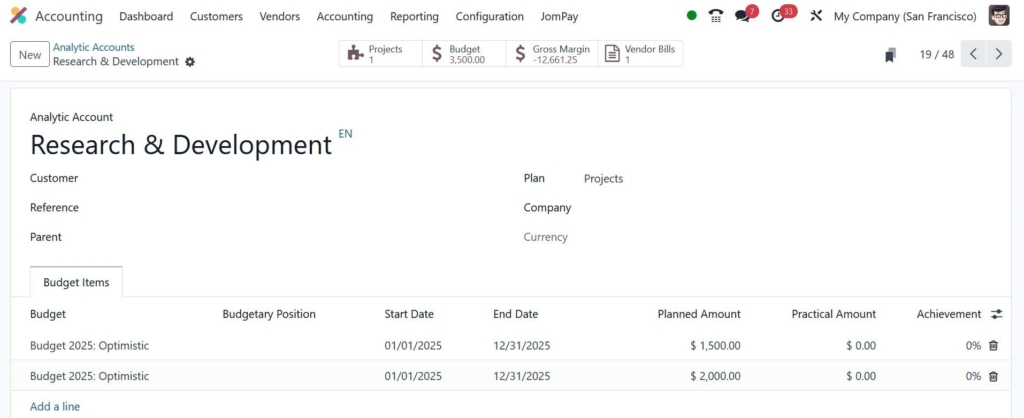
Now, let’s go back to the analytic account setup. You can enter budget plans under Budget Items to allow this analytical account to track the income and expenses of the budgeted items.

Click the Add a Line button to select a budget from the pre-configured list. For more information on the budget setup, which was previously discussed in-depth in this chapter, go to that section. By selecting the relevant smart buttons, you may view the gross margin and budget amount when the analytic account is established.
Now let’s look at how an analytical item gets added to an analytical account. For example, you want to add the amount of a vendor invoice to your analytics account. When creating the vendor bill to capture the accounting data, you will be asked to choose the analytical account.
After you approve the bill, the item will be added to the selected analytical account.
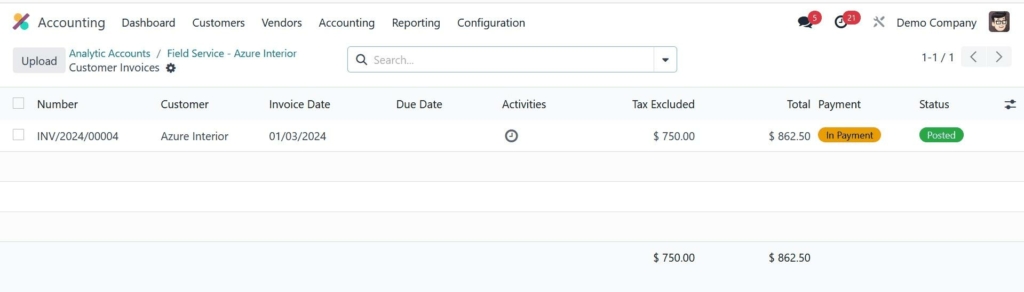
You can access the recorded vendor bill data in the analytics account by using the associated smart button, as shown in the screenshot above.
Model of Analytical Distribution
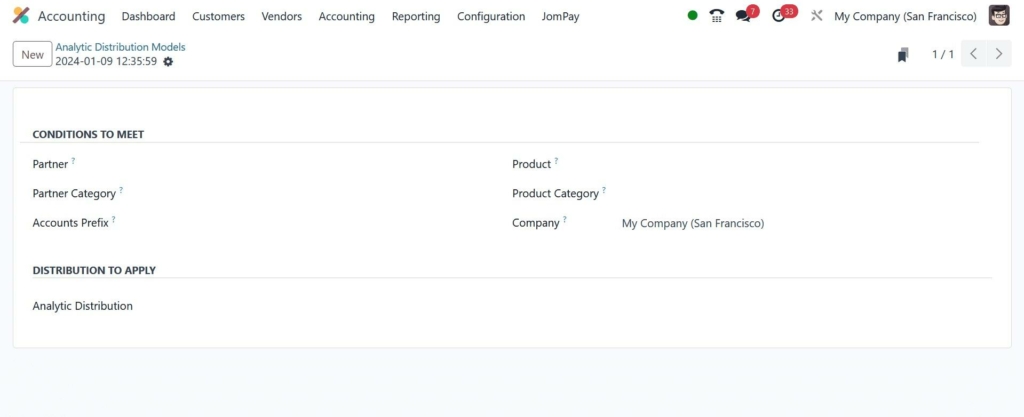
By activating the Analytic Accounting feature in Odoo, you may specify an analytical distribution for every journal entry. The whole amount might be divided among several analytical accounts. The module’s Configuration menu allows you to manage and add new Analytic Distribution Models.

The list preview shows the Accounts Prefix, Partner, Product, Company, and Analytic data for each Analytic Distribution Model.
You can create a new distribution model by clicking the New button.
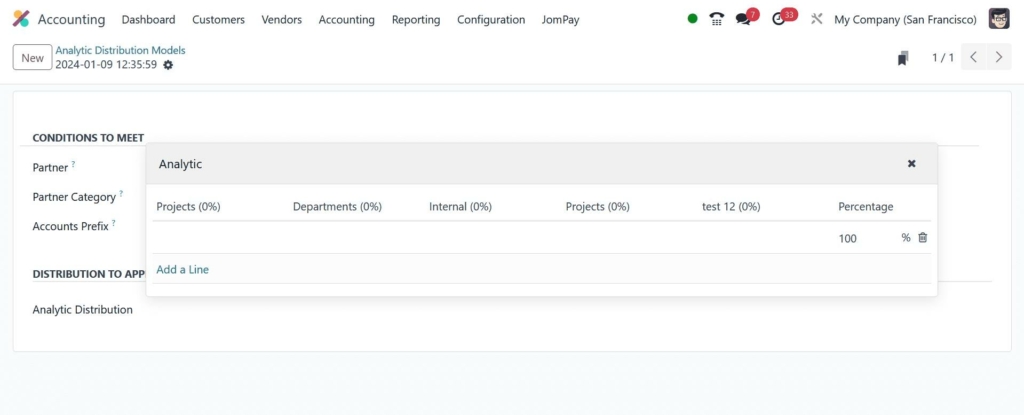
In this window, you can set the conditions for the distribution model. You can select which Partner, Partner Category, Product, Product Category, and Company the analytical distribution is applied to in the fields supplied. To indicate which financial accounting accounts this model should be applied to, provide the Accounts Prefix. You can choose which analytic accounts to utilize in the Analytic Distribution to Apply box to distribute the journal item’s quantity to different analytic accounts.
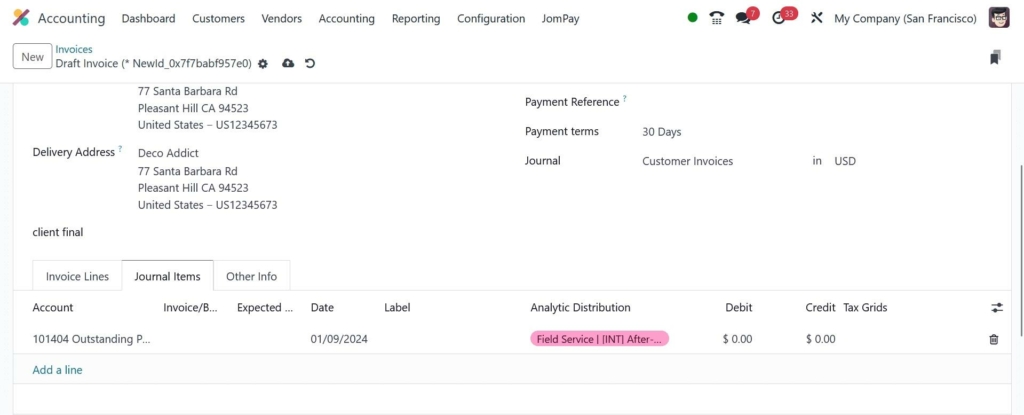
When you create an invoice after configuring the distribution model for a partner specified in it, the funds will be credited to the relevant accounts. Here’s an example.
Entries following payment verification.
The distribution models mention the analytic accounts to which the new analytical input is allocated. This is demonstrated by the screenshots. That pertains solely to analytical accounts.
"Unlock the Full Potential of Your Business with Odoo ERP!"
"Get a Cost Estimate for Your ERP Project, Absolutely FREE!"
Get a Free Quote