Refunds Management in Accounting Odoo 17
An essential component of every company that deals with consumer transactions is refund management. Managing refunds effectively keeps your company financially stable while also guaranteeing consumer happiness. One powerful ERP solution that offers a full suite of options to expedite the refund process is Odoo 17 Accounting. We’ll go over detailed instructions on how to use Odoo 17 Accounting to efficiently handle refunds in this article.
Businesses may refine and optimize their refund management procedures with the help of Odoo Accounting. A strong and effective refund management system is the result of its seamless integration, automated processing, transparent tracking, customer-focused communication, compliance, security features, and improved user experience. Odoo Accounting proves to be a useful friend for companies navigating the intricacies of financial operations, guaranteeing a customer-focused and efficient approach to refund administration.
Options for Refunds in Odoo 17
Two separate methods are available in Odoo for managing refunds. First, go to the Accounting menu. There is a special submenu called “Refunds.” This tool creates a centralized point for effective monitoring, streamlining the handling of all refund transactions inside your organization.
As an alternative, the second approach enables refunds to be generated right inside the Purchase module. One more option appears once a transaction is completed and the associated vendor bill is generated: “Add Credit Note.” This feature is a useful tool in Odoo 17 that makes it easier to create refunds quickly and easily. This increases the flexibility of handling financial transactions. Odoo provides flexible options for quick and customized refund processing, whether you want to use the “Add Credit Note” function in the buying module or the dedicated Refunds sub-menu in the Accounting menu.
1. Refunds from the Accounting Module:
Go to the Accounting module after logging into your Odoo account to manage refunds. Locate and choose the “Vendor” menu once you’re in the Accounting module.
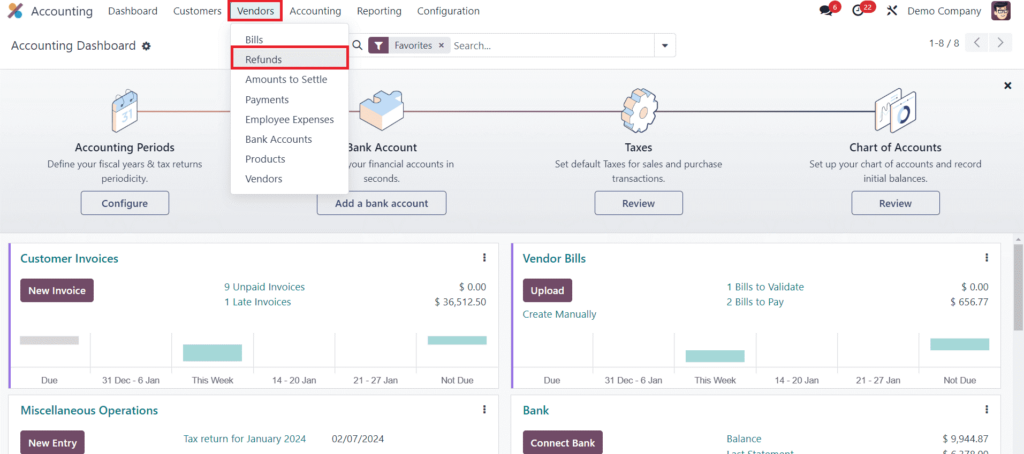
The Vendor menu has a sub-menu called “Refunds.” To access the refund feature, choose this option.
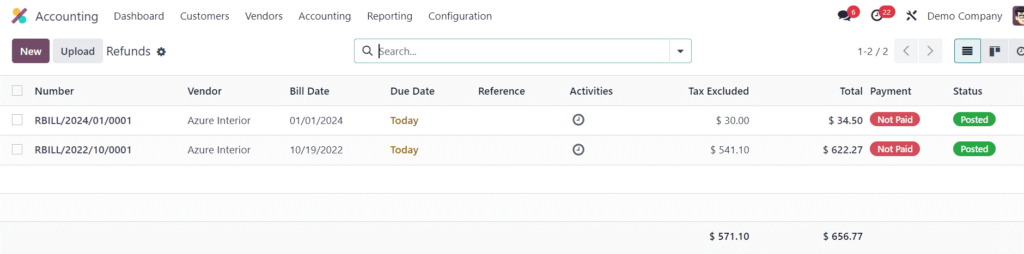
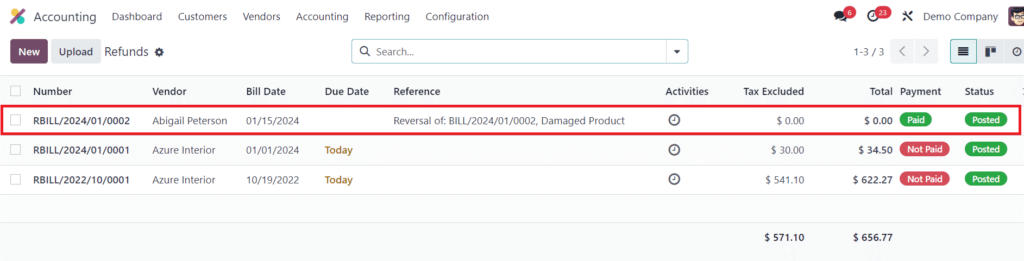
You may view all of the refunds that are produced from various purchase procedures here. Important information such as the Refund Number, Vendor, Bill Date, Due Date, Reference, Activities, Tax Inclusion, Total Amount, Payment Status, and Refund Status are displayed in the preview of the refund list. This well-organized display makes it possible to quickly and effectively review all of your refund transactions, allowing for more efficient administration.
With this platform, you can easily make a refund by using the ‘New’ button found in the Accounting module. This easy-to-use feature streamlines the procedure so that you may easily and quickly generate a new refund entry. Furthermore, the ‘Upload’ button is a useful tool that lets you upload several refunds to your Odoo database at once, which improves data administration and efficiency.
In Odoo 17, all you have to do is click the ‘New’ button to begin creating a new refund.
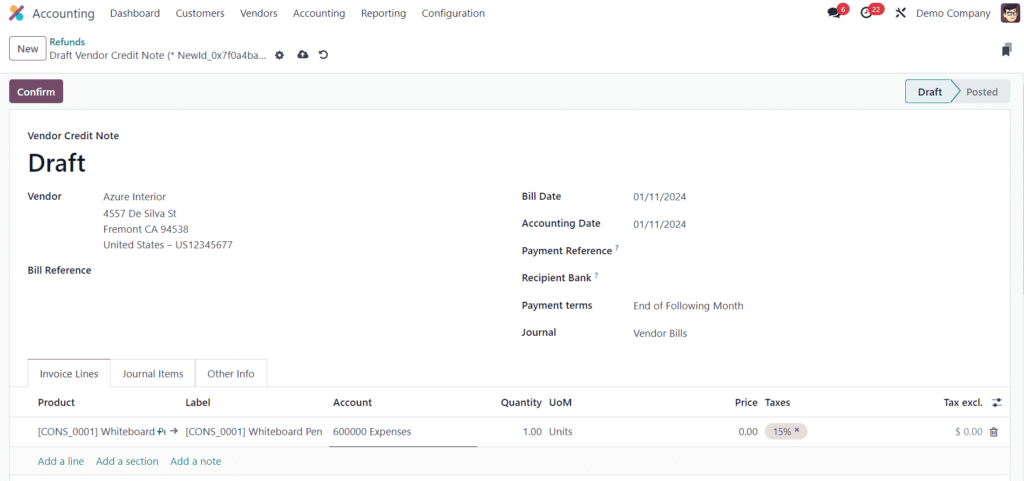
This will cause a new window to open where you may discuss the specifics of the reimbursement. Decide the seller you wish to process a refund for. Select the appropriate supplier from the inventory. The Bill Reference can be added in the designated area. This may be the invoice for a product that has to be reimbursed.
Complete the required refund information. The Bill Date, Accounting Date, Payment Reference, Recipient Bank, Payment Terms, and Journal are a few examples of these. The Invoice Lines tab is where you may change the product details. The relevant Bill Reference for the Refund will be automatically entered into the Invoice Lines and Journal Items tabs.
Verify the refund information again to be sure they are accurate. Once satisfied, click the Confirm button to submit the refund request.
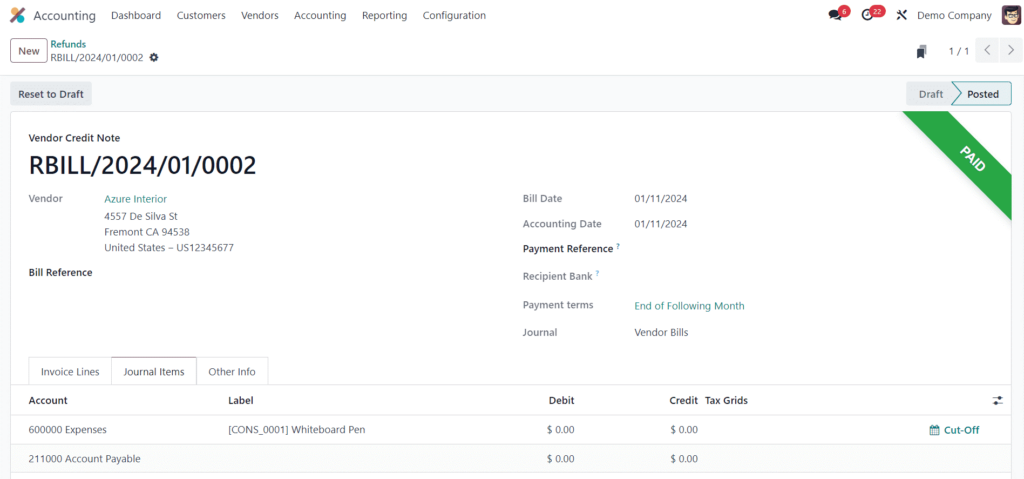
The accounting records will be instantly updated by Odoo to reflect the refund transaction.
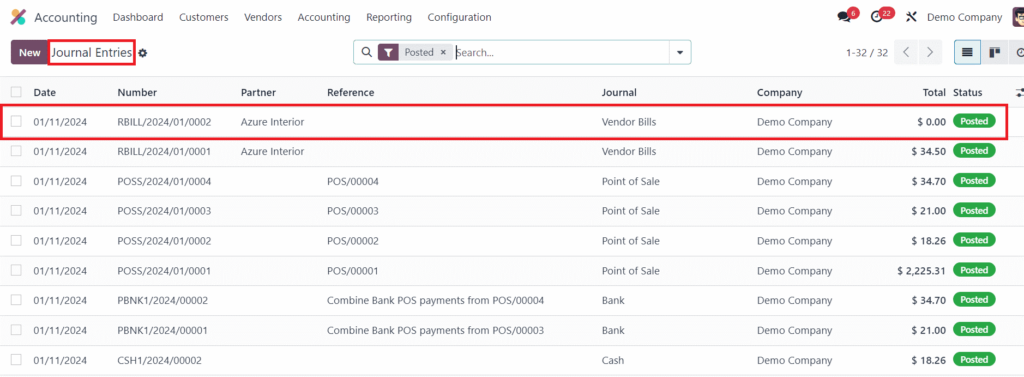
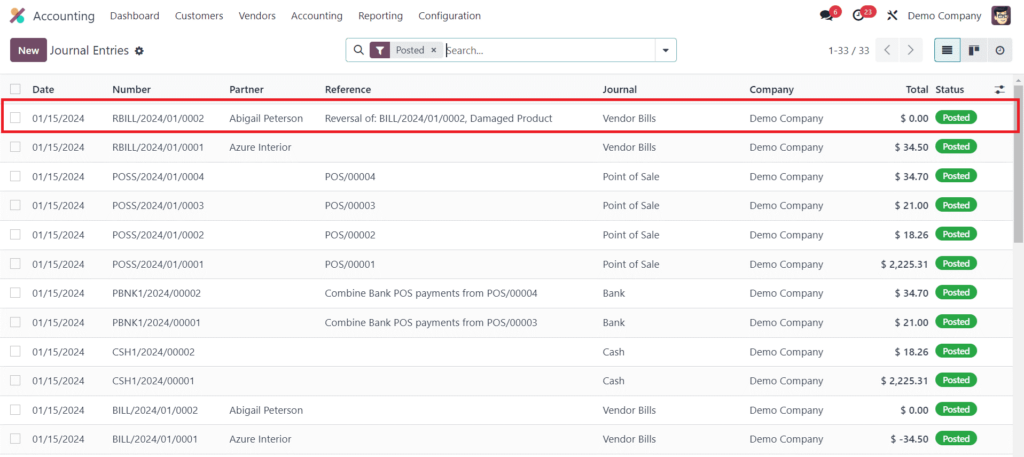
Check that the refund has been completed and recorded correctly by looking at the revised accounting transactions. You will find the journal entry related to the bill reversal that was created by the refund under the “Journal Entries” tab.
2. Odoo Refunds from a buy Order:
Let’s now examine how to create Odoo 17 refunds from a buy order. Using the “Credit Note” option found in the Vendor Bill, you may create refunds from the Purchase module in Odoo. Go to the Purchase module after logging into your Odoo account to accomplish this.
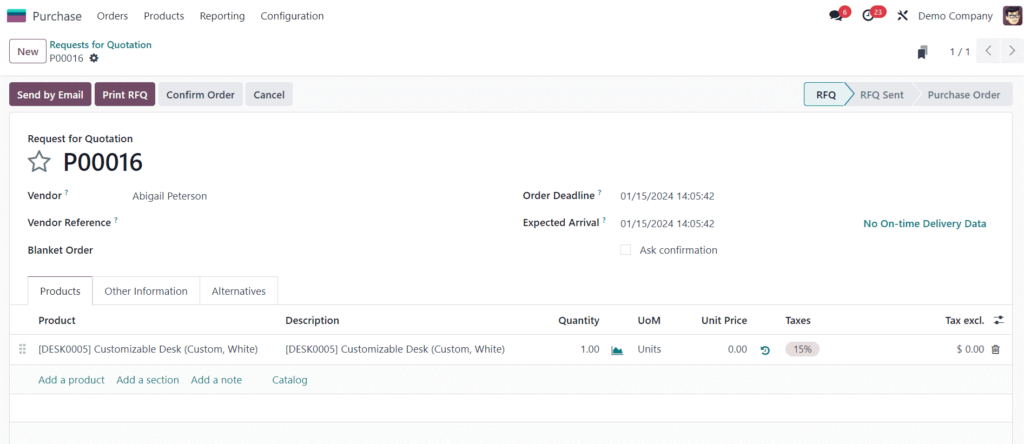
To begin the refund process, first draft a purchase order for the product or service you wish to return.
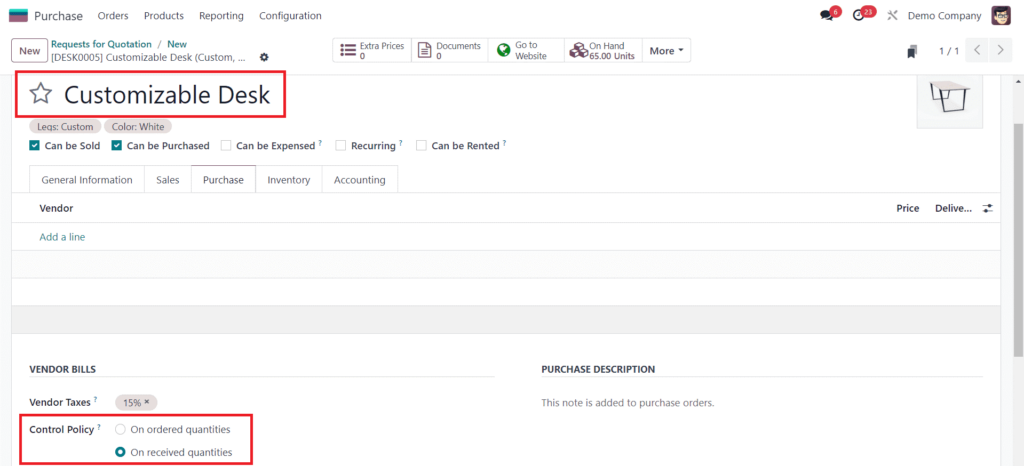
The product you want to return must have an “On Recieved Quantities” Control Policy.
Verify the receipt in the Purchase module when the goods or services are received.
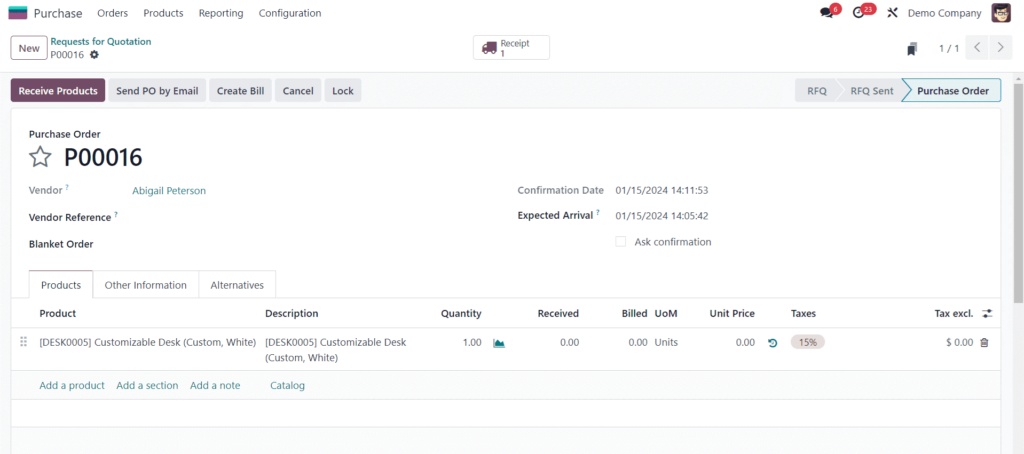
Based on the goods or services you have received, create a vendor bill. To accomplish this, choose the relevant purchase order and press the “Create Bill” button.

When you wish to return things because of flaws, damages, or unhappiness, you may do so in Odoo after completing the purchase and payment procedure. You have the option to provide a refund if there are billing problems, such as inaccurate numbers or pricing on an invoice. Refund invoices or credit notes might be used for adjustments.
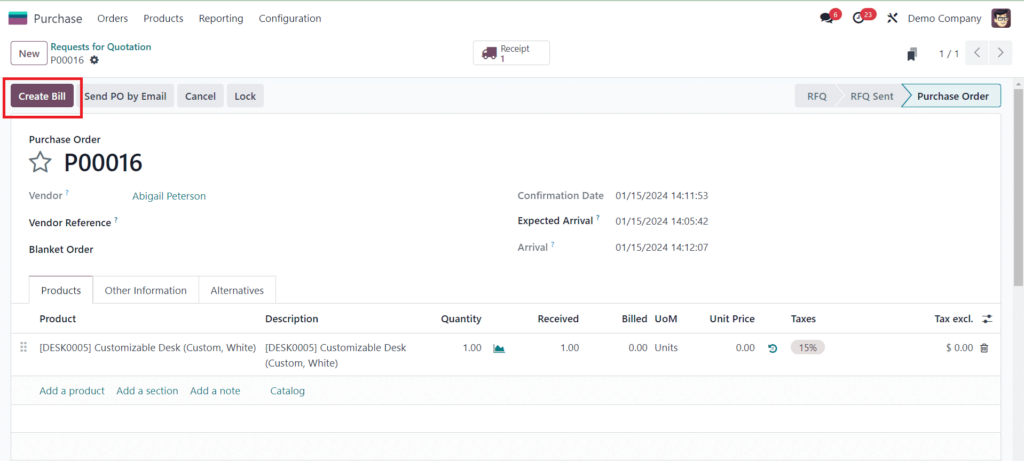
In the Vendor Bill, look for the “Credit Note” option. This is the crucial stage in starting a refund. Select this option by clicking. As seen in the image below, doing so will cause a new pop-up window to open.
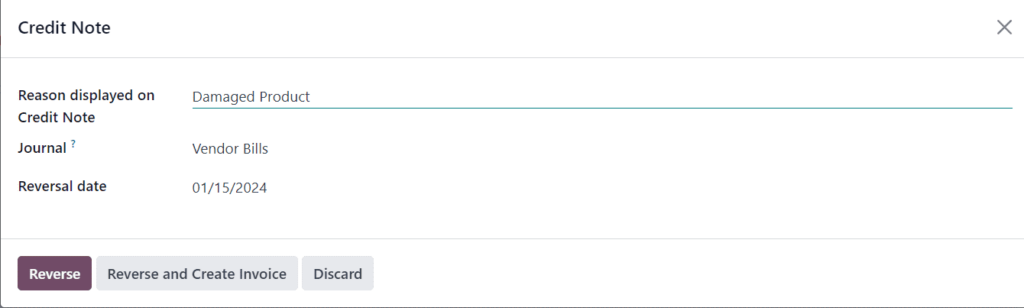
Give the credit note all the information it needs, including the reason, the journal, and the reversal date. Click the Reverse button now.
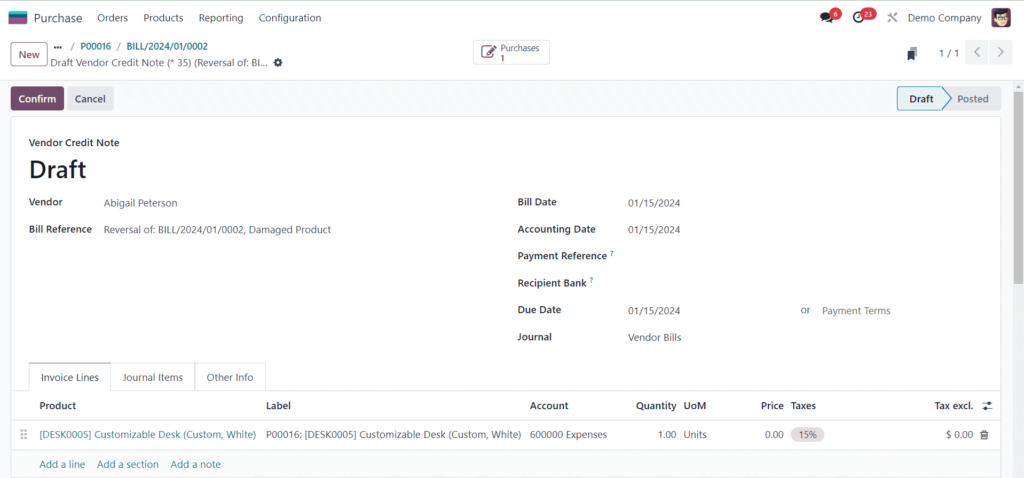
As seen above, this will result in a vendor credit note. Verify the transaction and the credit note. The Reverse Bill linked to the first vendor bill will be produced by this activity.
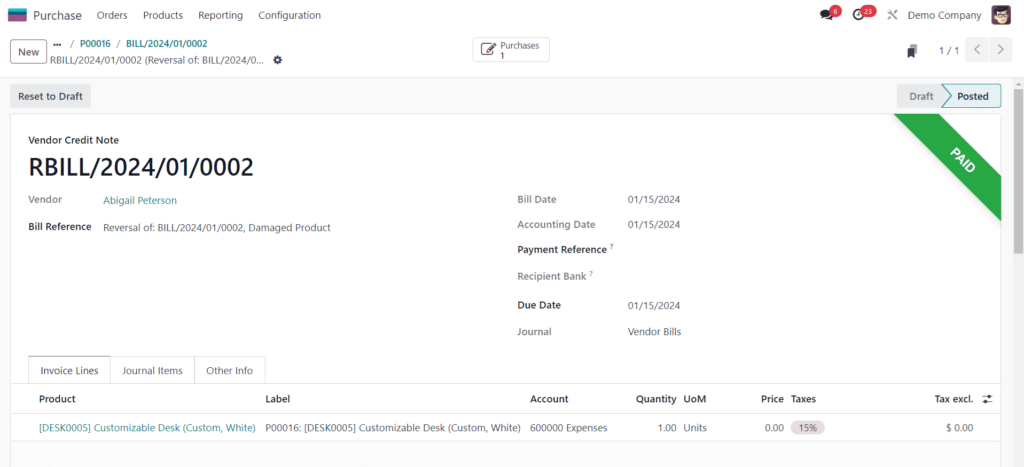
Verify that the corresponding refund has been handled and the credit note has been generated correctly.
Examine the most recent data in the accounting documents.
You may effectively create refunds for individual transactions in Odoo by using the “Credit Note” feature in the Vendor Bill of the Purchase module. Here’s how to accomplish it.
You may view all of the reimbursements generated in Odoo across various platforms by selecting the reimbursements option in the Accounting module.
Refunds must be handled well to preserve good customer relations and guarantee financial correctness. Businesses may increase overall productivity, automate procedures, and streamline the refund process using Odoo 17 Accounting. Through adherence to the comprehensive procedures delineated in this manual, your company may fully utilize Odoo 17 Accounting’s capabilities for smooth and client-focused refund administration.
"Unlock the Full Potential of Your Business with Odoo ERP!"
"Get a Cost Estimate for Your ERP Project, Absolutely FREE!"
Get a Free Quote