Customer Payments in Odoo 15
With the dedicated Payments management menu in the Odoo Accounting module, customers can easily pay for the invoices that have been generated for the purchases that have been defined in Odoo. The following screenshot illustrates how all the Payments operations defined for the business will appear under the Payments menu. Here the Payment will be described along with the Date, Journal, Number, description of Batch Payment, Payment Method, and Customer If it’s one of them, the Amount, Status, Currency, and SDD Scheme will be defined. In addition, the status will be defined based on the color sign, which will depict the operational status of Customer Payments.
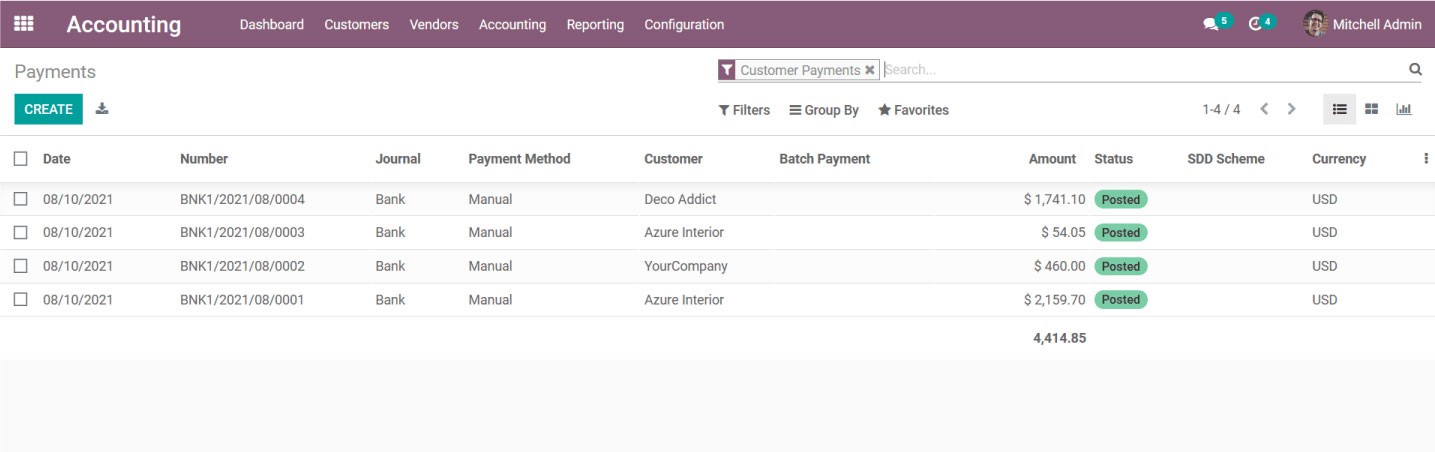
Customer Payments
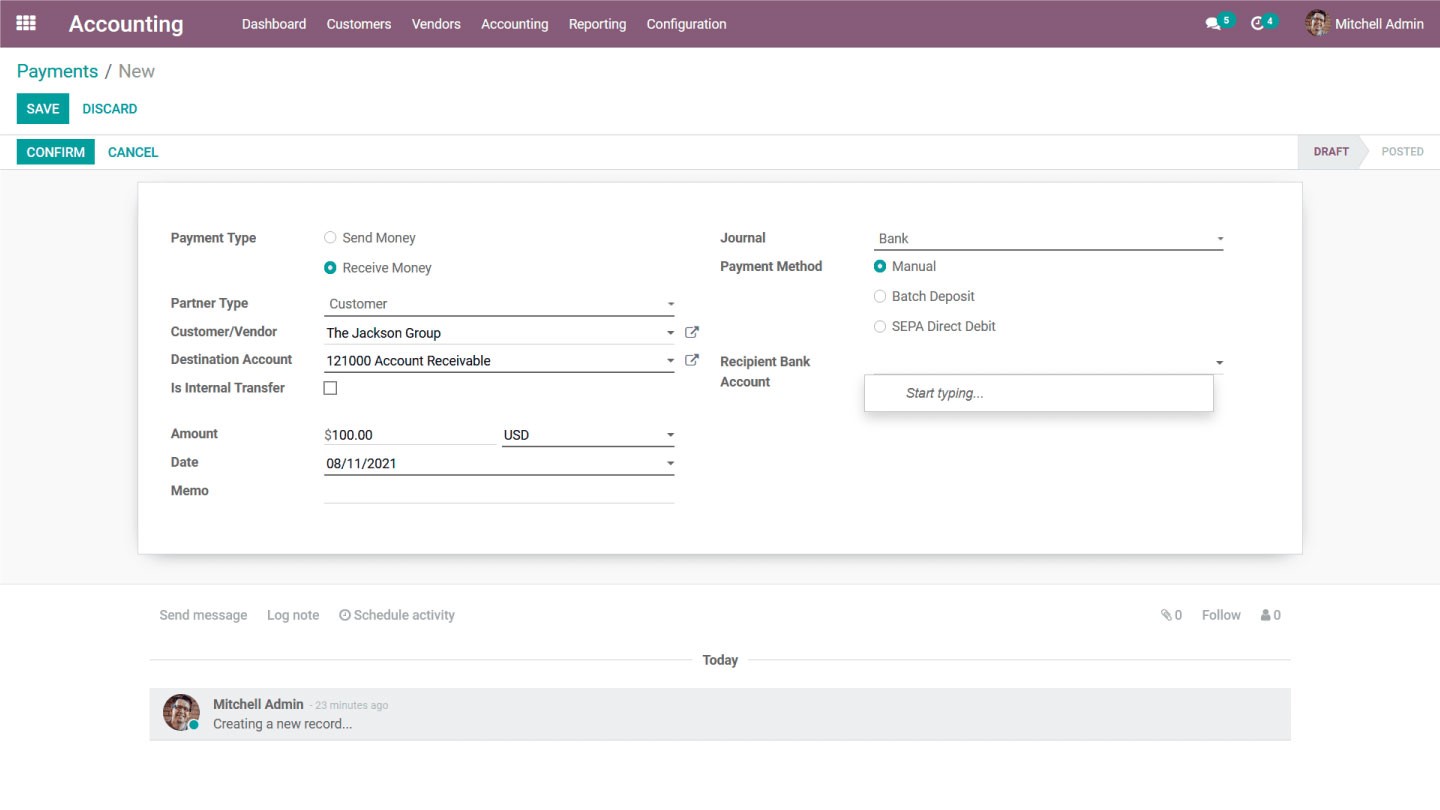
We can edit the details of the defined Customer Payments and also create a new one by selecting the Create option. Upon selecting create new Customer Payments, you will be redirected to the window as shown in the following screenshot. Here, we can define the Payment Type as Receive Money or Send Money and Partner Type, Customer/ Vendor details can be provided along with the Destination Account. The Send Money option is for the Vendor Type, and the Receive Money option is for the Customer Type.
If the Payment Type is selected as Receive Money and the Partner Type is selected as Customer, the chosen destination Account of the Customer will be automatically depicted with the Account Receivable. As well, this will be a useful feature for managing customer accounts and receivables of invoice amounts. If the Payment is to be made with an organization or partner company, you can enable the Is Internal Transfer option.
In addition, you can define the Currency and Amount, Memo details, and Date along with the Journal, Payment Method, which can be selected as Batch Deposit, Manual, or SEPA Direct Debit. For each Customer Payment, the Recipient’s Bank Account can also be defined.
Payments configuration
Upon Payment from the Customer, they can be added to the Pending Invoices of that Customer. For example, assume Customer ‘The Jackson Group’ made a payment of $100, and if that customer has an invoice for $100, the Payment can be added to the invoice through the payment matching option. When clicking on payment matching, it displays all open invoices of that customer that need to be matched with the Payment. The invoice with the same amount to be paid by the customer can be chosen with the Payment and reconciled. This feature of the Odoo platform is called Payment Matching.
After reconciliation with the Bank Statement, the outstanding receipts are credited, and the Bank Account is debited. After the Customer Payments configuration is done and the Payment is sent, you can register the Payment, and the Payments menu will display a Sent label, as shown in the screenshot below.
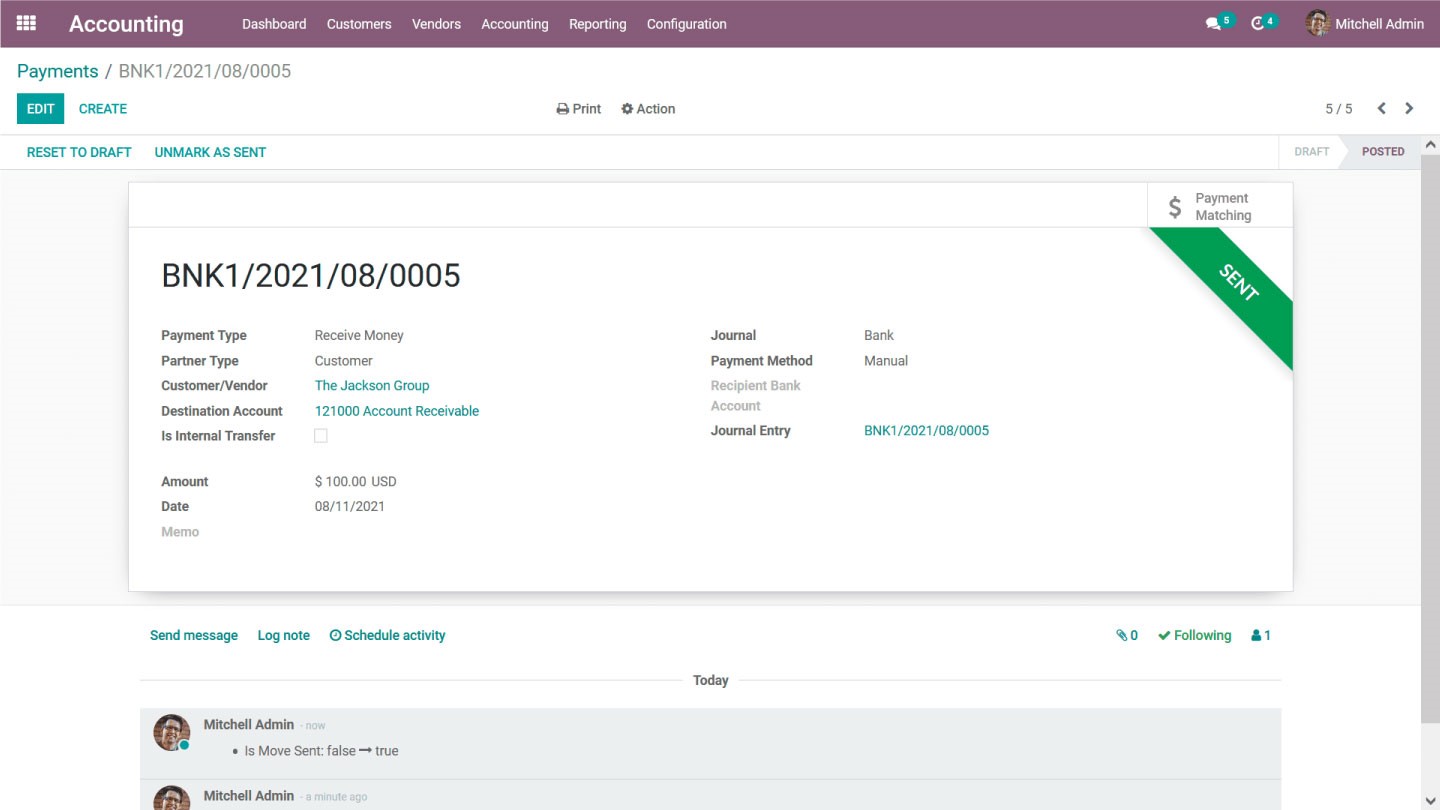
You will have the option to Unmark it As Sent and Reset it To Draft so you can edit the configuration aspects of Payment. However, these options will only be visible to allowed users of the Odoo platform, enabling you to safely limit the configuration operations to the company’s managers and executives. In addition, All Payments can be filtered based on Draft, Posted, Sent, Reconciled, Un-reconciled, and many other options in the Filter. As of now, you will have a basic understanding of how to manage customer payments with Odoo Accounting.
If you plan a new ERP Software implementation and you have heard about Odoo and got attracted by the Odoo ERP platform, and used it but don’t have time, resources, or knowledge to manage this yourself, looking for professional help, then you have come to the right place. Bassam Infotech has implemented scores of Odoo ERPs all around the world. In addition, we have also developed and delivered our own customized Odoo applications with minimal Odoo implementation costs.
DOWNLOAD odoo
Bassam Infotech is a company of Official Odoo Certified Experts with 24 years of expertise. We are a one-stop shop for all your business needs, including Odoo Implementation, customization, integration, and support. We’re available by phone or email, with a 24-hour response time in case you need immediate Odoo ERP support. For more details, Call us at +91 88912 49995 or +91 70250 75566 email us at info@bassaminfotech.com, or fill out the form to get a free consultation
"Unlock the Full Potential of Your Business with Odoo ERP!"
"Get a Cost Estimate for Your ERP Project, Absolutely FREE!"
Get a Free Quote