How To Create Analysis Dashboard For A Custom Model
A dashboard is a powerful tool that helps to track and monitor all the essential data in a single place. It can be considered a graphical or organized representation of data. It basically helps you track and monitor your business data with the help of well-represented graphs, charts, etc. With the help of Odoo, we can customize and also create a Dashboard using simple steps. In this blog, we will look into the steps required for creating an ‘Analysis Dashboard’ for a custom model Odoo.
The first step to creating a custom dashboard will be to define the ‘menu item’ and its corresponding ‘action’ for the dashboard. In order to do so, we can create an ‘XML’ file with the required details in the custom module as shown below.
The below image shows the ‘record’ for declaring the menu item action.
Various aspects mentioned in the above image are –
- record id – Unique ‘id’ for the action
- record model – “ir.actions.act_window” is used to declare an action
- name – Name of the action
- res_model – Custom Model Name where the specified action is to be performed
- view_mode – different Odoo’s view modes that can be used in order to view the data in the model.
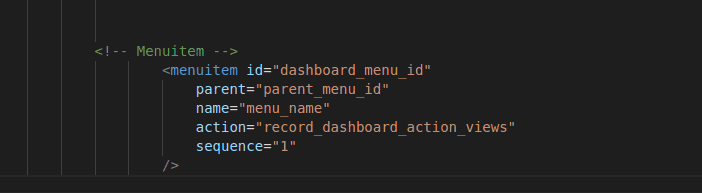
The below image shows the ‘menu item’ declaration along with the action that was created in the above step.
 The next step is to define separate views for all the ‘view_modes’ that we have selected in the ‘action’ for the above menu item. Here, we will have to define a separate view for the graph and pivot.
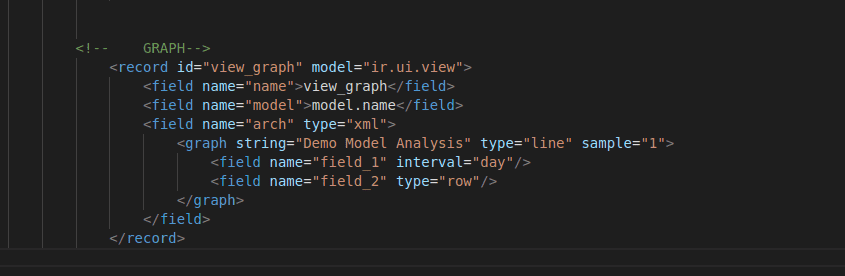
The below image shows how to create a custom graph view for our model.
 Various aspects mentioned in the above image are –
- record id – Unique ‘id’ for the view
- record model – “ir.ui.view” is used to declare a view
- name – Name of the view
- model – Custom Model Name where the specified view is to be added
- <graph> tag – used to define contents to be included inside the graph
- Inside that tag, we can provide the fields which should be shown on the x-axis of the graph and the y-axis of the graph.
- In the above image, there are two fields ( field_1 and field_2 ).
- Inside the field, we can set whether it is the row ( eg: type=”row” ) or the column value ( eg: type=”col” ) by setting the type.
- Probably the interval of the graph can also be set whether it is day or month(e.g., interval=”day”).
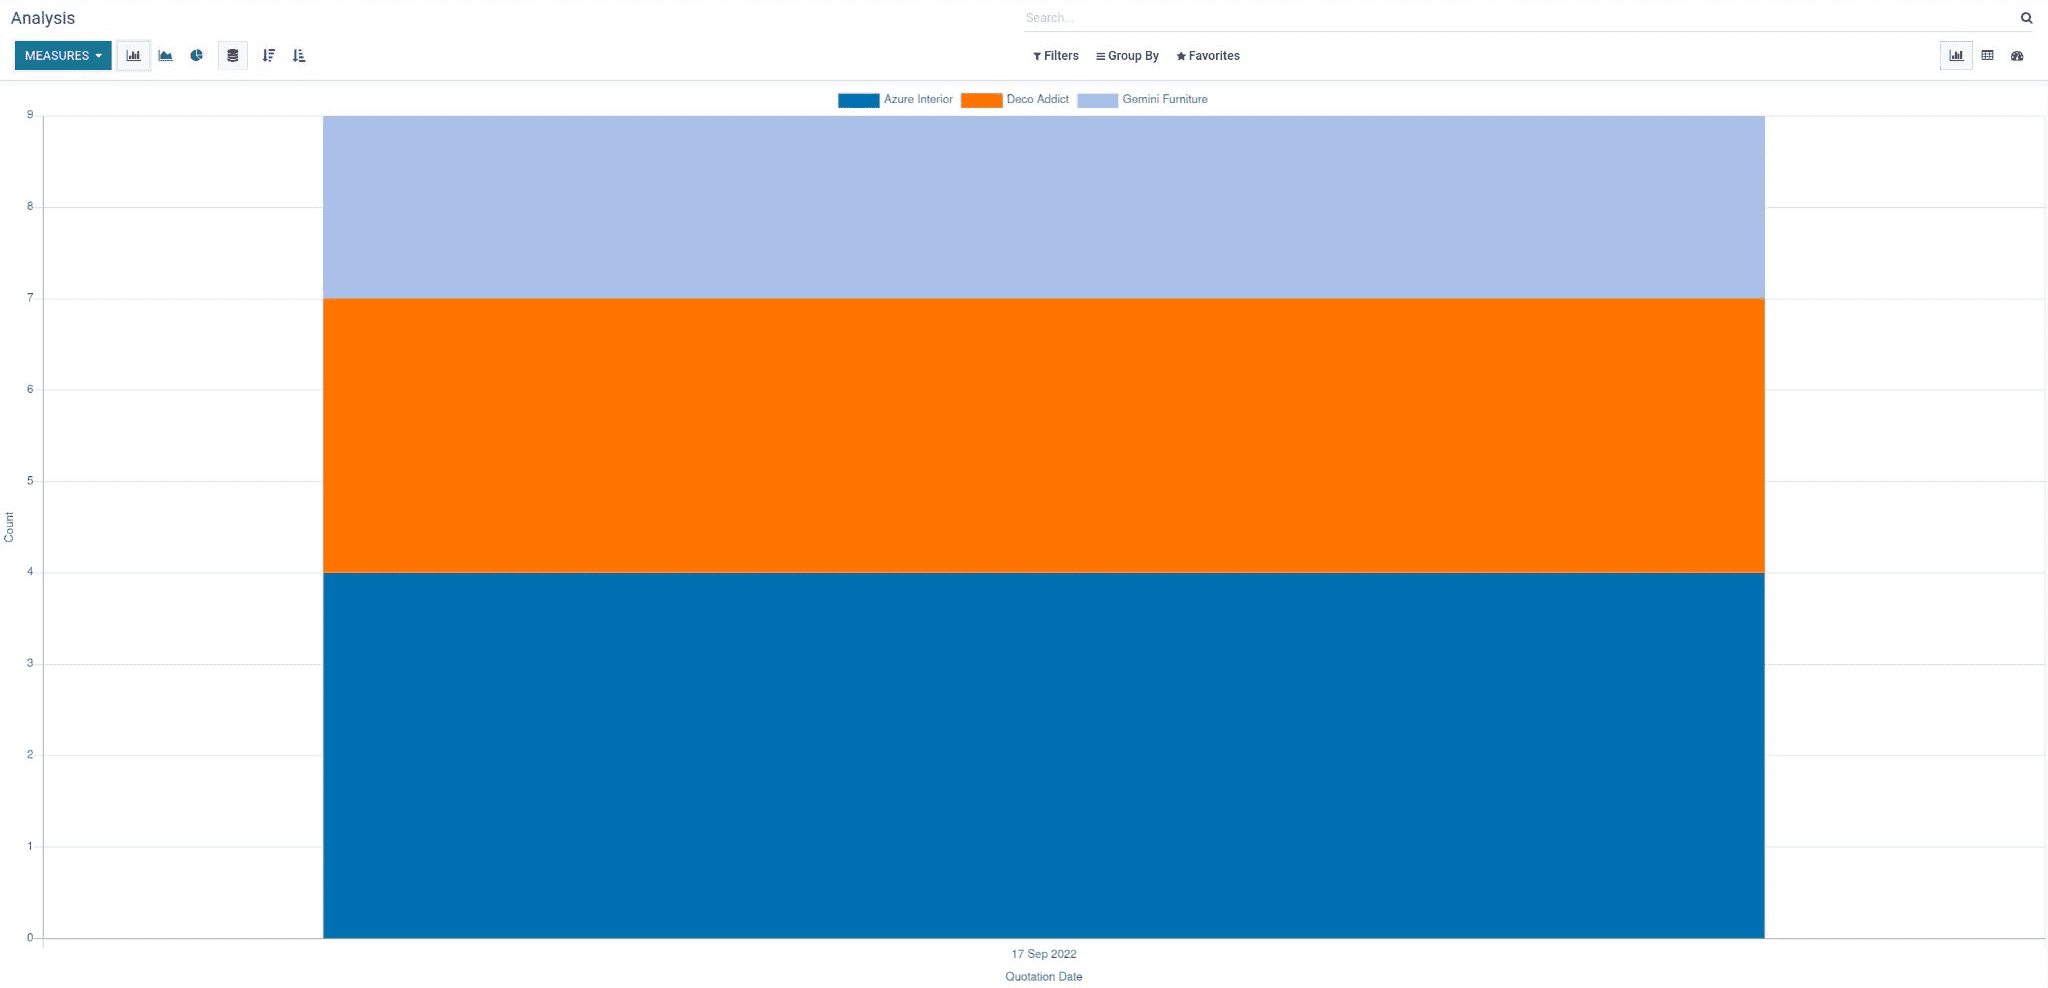
The above code will give an output of the graph view as shown in the below image.
The next step is to create a custom pivot view for our model. This can be also done in a similar way as we created the graph view.
Various aspects mentioned in the above image are –
- record id – Unique ‘id’ for the view
- record model – “ir.ui.view” is used to declare a view
- name – Name of the view
- model – Custom Model Name where the specified view is to be added
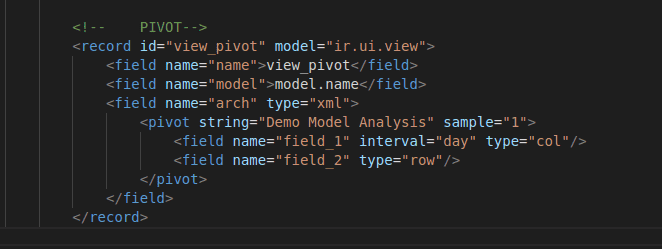
- <pivot> tag – used to define contents to be included inside the pivot
- Inside that tag, we can provide the fields which should be shown as rows and columns of the pivot table.
- In the above image, there are two fields ( field_1 and field_2 ).
- Inside the field, we can set whether it is the row (eg: type=”row”) or the column value ( eg: type=”col” ) by setting the type.
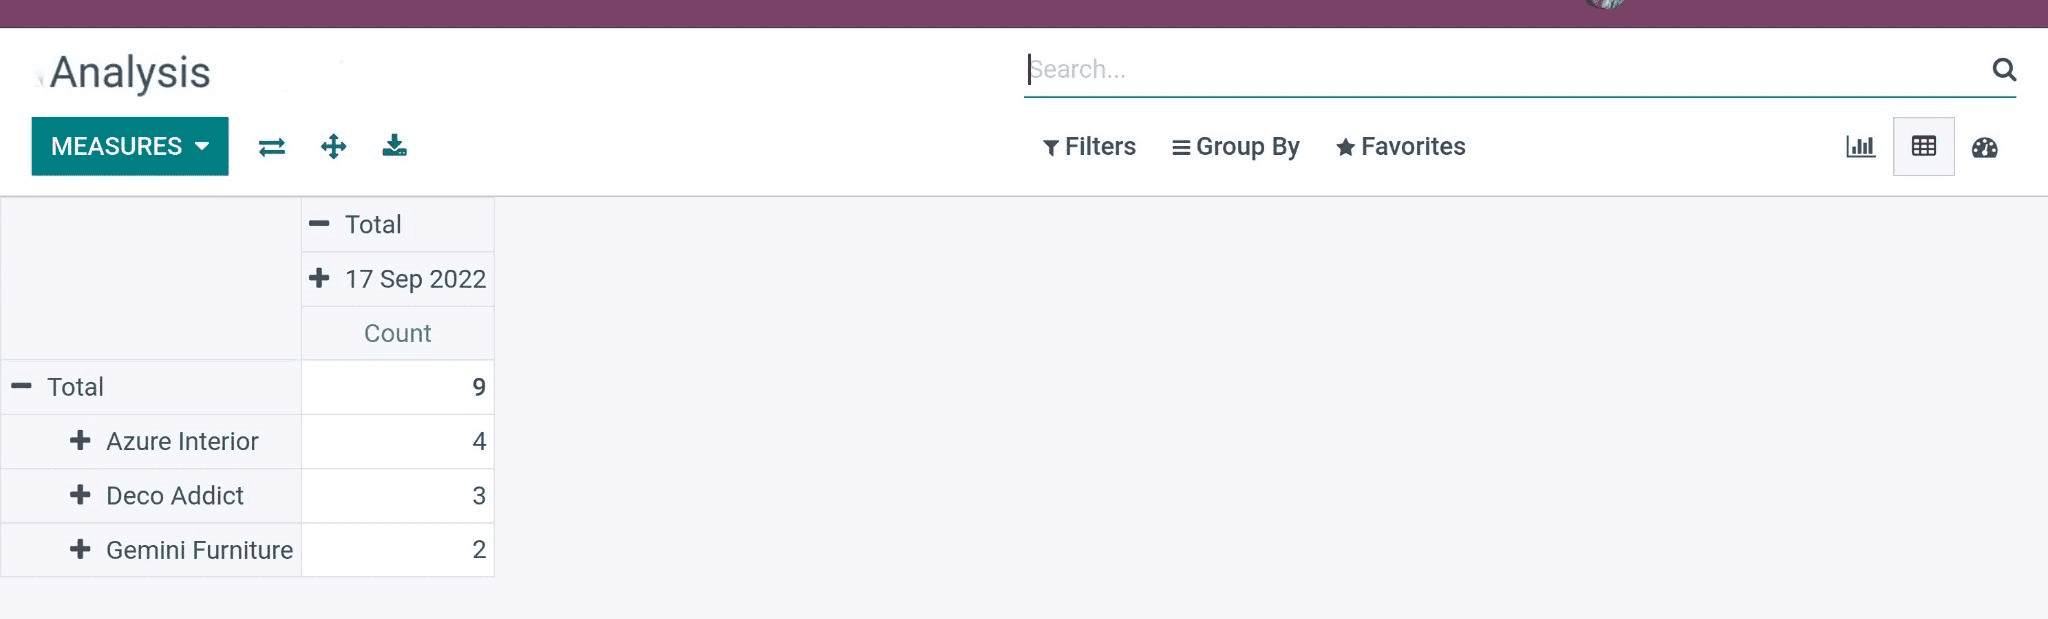
The above code will give an output of the pivot view as shown in the below image.
After defining the views for the graph and pivot, next we will have to define the view for our dashboard which will include the references of these two views.
DOWNLOAD ERP
The below image shows how to create a dashboard view for our model using the above-created graph and pivot views Odoo.

Various aspects mentioned in the above image are –
- record id – Unique ‘id’ for the view
- record model – “ir.ui.view” is used to declare a view
- name – Name of the view
- model – Custom Model Name where the specified view is to be added
- <dashboard> tag – used to define contents to be included inside the dashboard
- Inside this, we can set the reference to the views that we have already created, i.e. graph and pivot.
- Example : <view type=”graph” ref=”module_name.view_graph”/>
-
- By this, the view created separately for the model will come under the same dashboard view.
- We can also expand the views separately by using the aggregate tag to count the field by giving the field name.
Example : <aggregate name=”field” string=”#Field” field=”field_1″ clickable=”False”/>
-
- Also, we can set it if the view is clickable. The name that we pass on the string will be shown in the view.
- Example : string=”#Field”
-
- We can create a pie chart inside the dashboard by using the widget called ‘pie chart’.
Example : <widget name=”pie_chart” title=”Date” attrs=”{‘groupby’: ‘example_field_date’}”/>
-
- The title will be shown at the top of the pie chart and we can also define the dependent field as ‘groupby’: ‘field_name.’
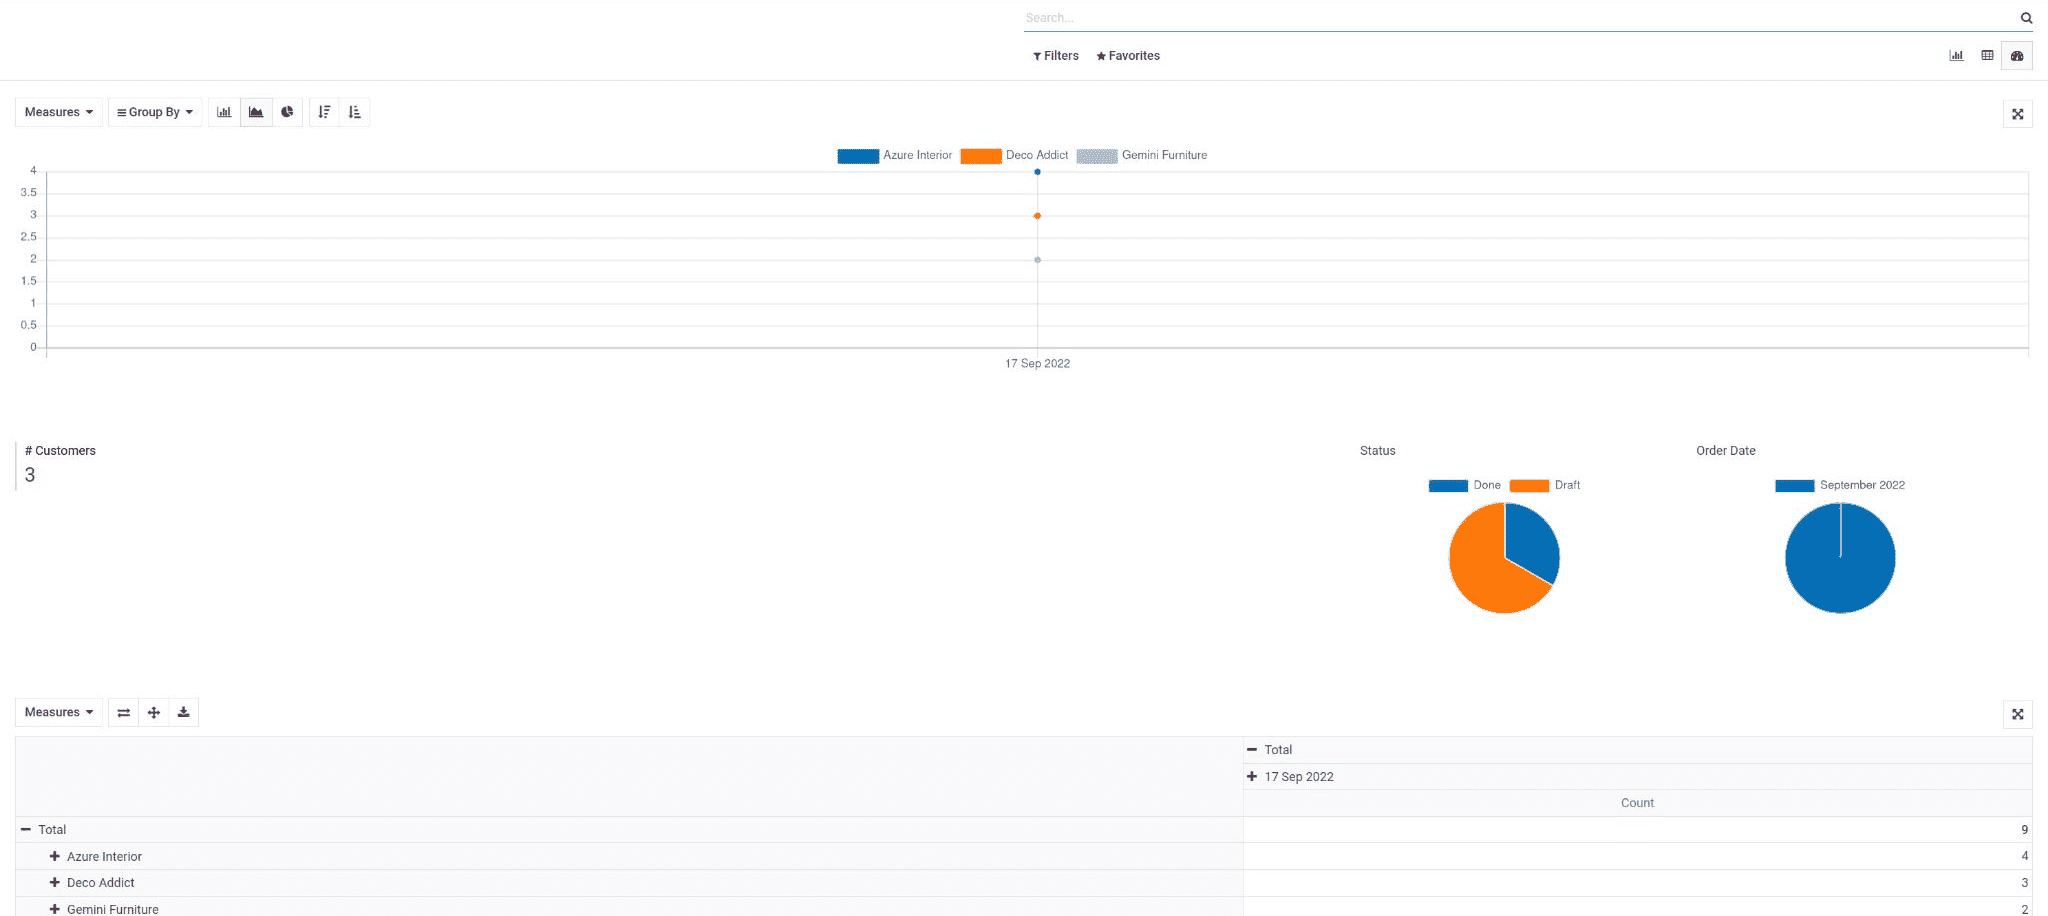
The above code for the dashboard view will give an output as shown in the below image.
Therefore, a dashboard will ease tracking and monitoring data. As mentioned above, with the help of Odoo we can customize and create a user-friendly and attractive dashboard which will eventually help in the progress and success of any company.
"Unlock the Full Potential of Your Business with Odoo ERP!"
"Get a Cost Estimate for Your ERP Project, Absolutely FREE!"
Get a Free Quote